Technique for Jumps

Share with Others

By Beth Blose

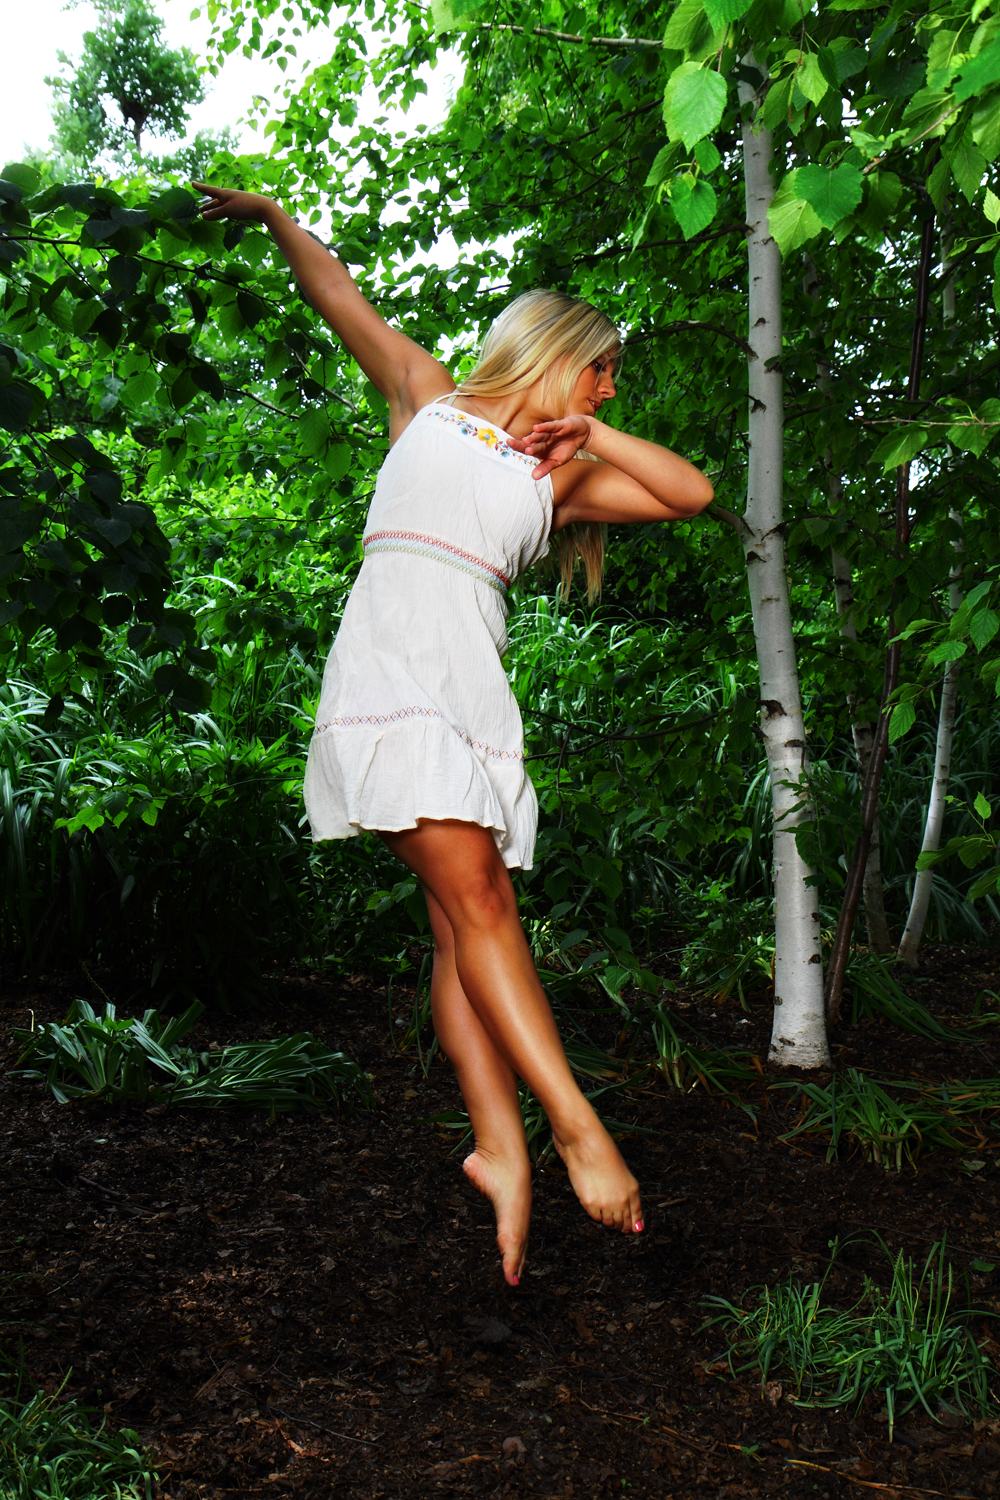
Important aspects of most jumps:
1) Flexibility
2) Pointed toes
3) Correct arm placemat
4) Keep legs straight
5) Push off by using a plie
6) Land with knees bent
7) Chest lifted

Always warm up and stretch out thoroughly before practicing jumps.

Strengthening your core and your legs are important to achieve high jumps and leaps.

Sit-ups, lunges, squat, and wall sits are good uncomplicated strengthening exercises. Don’t forget to work your back to balance out your strong abs.

Doing sit-ups on a stability ball is a great way to challenge your body.

To practice for toe jumps do tuck jumps with the same arm prep you would use for your toe jump.

Do small jumps in first and a small second, you can do these both turned out and parallel. Make sure you work through and use your whole foot to push off the floor. Use your pleae and push off with your feet. When in the air, make sure that legs are extended straight and toes are pointed and engaged.


Toe Touches:
Prep with strong arms and knees bent. When in the air keep your back lifted and your arms in a T. Don’t reach for your legs. Push our knees straight, and make sure you bend when you land to absorb the shock and avoid injuring yourself. Land with your feet together!


Toe Jump Drills:
Do several toe jumps in a row. If in a team get together in a circle and go around doing toe jumps one after another. You can do standing prep jumps or start in a ball.

  • Start by stretching out. Stretching is the key to gaining and maintaining flexibility. And to avoid pulling or straining your muscles, make sure you are completely warmed up before throwing your jump.
  • It’s vital to constantly train your leg and stomach muscles. They are the ones who give you the height you need off the ground and enable your legs to be pulled higher.
  • Do crunches! Lay on your back on the floor, with your legs straight out in front of you and your arms in a touchdown motion. Sit up, then bring your legs up and roll back into a toe touch, or straddle position, and bring your arms between to a T. It’s like you’re doing a toe touch sitting on the floor. 10-15 reps is a good start. While they may hurt after a few, and they’ll certainly look and feel awkward, they will help your jumps tremendously.
  • Next, do three sets of leg lifts. You will be in a straddle position with your hands behind you for support. Slightly lean back and lift both legs about a foot off the floor. Keep your legs straight, without letting them touch the floor, and lift them 10 times. Release, then count to 10 for a breather and repeat. Do a total of three sets. Once again, these exercises are hard but will strengthen your legs and increase the height of your jumps.
  • Squat jumps are great for gaining height and strength in the right areas to improve your toe touch. Crouch down, touching your fingertips to the floor. Then jump up, bringing your arms above your head, shrugging your shoulders up like you would doing a jump. As soon as your feet touch the floor, return to the starting position. It’s good to start with 20 or so.
  • After leg lifts and squat jumps, you’re ready for side high kicks. Place your arms in a T or high V motion, then start off by kicking your right leg up five times. Take about a 5-second breather, then do the same with your left leg. Just as with squat jumps, increase your kicks gradually.
  • Do a few tuck jumps with the approach. As soon as your feet hit the floor, go back up into a tuck with no prep. This will work your stomach and legs muscles together. Start by doing at least five.

    Tips to Remember:

  • Keep your head up and your back straight.
  • You must have a good prep. If you don’t use correct technique – feet and legs together, bent knees, back straight – your jump will not look very good. Really concentrate on using the muscles in your legs when prepping. Remember, that’s how you get off the ground to execute your jump in the first place!
  • When you’re in the toe touch position, in the air, do NOT reach for your legs. Your arms should be in a T motion, and you should bring your legs to your arms.
  • Keep your legs straight. Bent legs make your toe touch look sloppy.
  • Point your toes.
  • Snap your legs down with as much force as you brought up.
  • Land with a slight bend in your knees. You could easily cause damage by landing with too much force on straight legs.
  • Something to keep in mind is that you have to consistently work on building up the strength in your arms, shoulders, abs, and legs.
  • Work on all aspects of your toe touch – the prep, lifting, execution, with all the small details, and your landing.
  • Practice! Work on your jumps each and every day. You must build endurance just like you would in a normal workout.

    More Ways to Develop/Improve your Toe Touch:

  • Put your jumps to an 8-count and repeat. Start with three or four and gradually increase.
  • Practice with assistance. Stand facing a teammate, then have him or her support you under your forearms. The teammate who is supporting you should push up on your arms as you jump. This is a good exercise for you, whether you’re a cheerleader or dancer, to get the feel of a toe touch while learning to point your toes.
  • Practice the straddle hold. Sit on the floor in a straddle position. Point your toes and hold for 10 seconds. Repeat as many times as you feel necessary.
  • Do straddle lifts. There are a few variations to this exercise. Sit on the floor in a straddle position, then:
    • Lift both legs up, keeping them straight. Your arms should be pointed down touching the floor directly in front of you. Slightly bounce them up and down, without letting them touch the ground. (Hint: Your legs do not need to be lifted very far off the ground.)
    • Lift only your right leg, still keeping both legs straight. Repeat above steps, with the exception of one leg, then do the same for your left leg.
    • Lift both legs up slightly, keeping them straight. Hold them in that position for 10 seconds, without bouncing. Then slowly bring them back down. Repeat two to five times.
  • Hang from a bar, if available, and lift your legs in V-up movements. V-up sit-ups are relatively like normal sit-ups. Lay flat on the ground with your arms in an upward touchdown motion. Bring your upper body and your legs up (keeping them straight) at the same time, touch your touches, then slowly lay back down. Repeat 10 times.

Share with Others

It’s Never Too Late

Share with Others

By Genise Caruso

My answer was always the same. When asked, as a small child, what I wanted to be when I grew up, no hesitation or thought was necessary. I wanted to be a ballerina!

One of my earliest and fondest childhood memories was going to Saturday morning ballet class. I still hear a haunting voice calling out, “plié, rélevé, chassé, rond de jambe, chaînés….”Nothing is still so vivid in my mind, or left such a lasting impression. As far back as I can remember, ballerinas fascinated me. They were beyond perfection; ethereal beings, surely not mortal, as no female form my young eyes had seen was as exquisite and flawless. Even Barbie® couldn’t hold a candle to these heavenly creatures.

Like angels or fairy princesses, I believed a magical aura surrounded them. Dressed in silken skirts, flowing with shimmering opulence, or majestic tutus sequined in red, turquoise and gold, their lithe bodies seemed to defy gravity during a grand jeté.

Yet more than the glitter, above the glamour, and beyond the enchantment, my foremost preoccupation was with pointe shoes. I earned my first pair at the tender age of six and nothing in my world was better. I think the fact they were so scarce; the only place that sold them was Capezio Shoes, downtown, (Chicago) made them even more irresistible. Opening that box, unfolding the tissue paper to expose two perfect pink satin slippers, square wooden toe and long satin ribbons that tied around my ankles, was better than all Christmases and birthdays put together.

I have vivid memories wearing my pointe shoes around the house, trying to “break them in,” or bending them back and forth, to get rid of the stiff unnatural arch. When I wasn’t wearing them, I stared at them, even slept so they were the first things I’d see when I woke up. I was so in love with my pointe shoes, I would gladly have given up candy, ice cream and all my toys to keep them. I probably wouldn’t have traded them even if I never had to go to school again!

Every Saturday morning, at 10:00 am, I did pliés, arabesques, frappé, in first position, second position, and sauté, taught by Miss “K.” (I never realized at the time, her last name was actually Kaye) Year after year I danced and when I wasn’t dancing, I was doing cartwheels, handsprings or splits, as acrobatics was a part of the lesson.

Eventually I went from a gawky three-year-old child, to a poised and graceful young lady of 15. There were countless recitals and shows. I even had a part in a professional production of The Nutcracker Suite, but the images I recall most are the beautiful costumes and getting to wear eyeshadow and lipstick.

I had talent; everyone who saw me dance said so. It wasn’t simply in the mind of an enthusiastic child. I was good. I can’t remember a time where my enjoyment or exuberance faded; I always loved dancing. But as the years passed and my body changed, it became more of a disservice than complementary of a dancer. As a child, I was relatively proportionate in height and weight, but rather muscular from my years of ballet. Since a majority of my friends were quite a bit shorter than I was, everyone assumed I’d grow to be above average height. I know better now that despite a persons stature in childhood, it hardly is a determination of the cards we are dealt as an adult.

At the age of 11, I was 4 feet, 11 inches tall, and that is exactly where I remained and to this day, I have never seen the other side of five feet! In addition to my petite nature, I was “blessed” with curves, short muscular legs, no torso and ample hips. In my mind Iwas that slender, long-legged, willowy form, I so envied and worshiped for many years. Yet in reality I had about as much chance pursuing a career as a professional dancer as I would have being a professional model. The buck stopped here.

I gave up my dream of becoming a ‘ballerina,’ and went on with my life, though never really loosing the desire or ability to dance. During high school, I always held dance parts in plays and shows, but became more involved in cheerleading and gymnastics. Occasionally; however, I attempted to return to some type of formal dance classes, and took up jazz, modern dance and even belly dancing, but never again did a plié, or donned a pair of ballet slippers. It wasn’t a lack of interest; more likely a lack of confidence. Worse yet, I guess I always wondered, “what if,” and was afraid returning to ballet may open up some very intense and overpowering memories of a time in my life when I was wide-eyed and hopeful, filled with pipe dreams and wishes upon a star.

A lifetime has passed since I first stepped into Miss “K’s” dance class. I’ve married, divorced, married again and have three sons, ages 14, 18 and 33. Now at the age of 52, I look back on moments in my life, knowing I haven’t always made the best choices or taken the right steps. Many aspects in my life weren’t what I’d hoped for and many decisions led me down counterproductive paths. The older I became the more my attention revolved around negative factors such as wrinkles, gray hair, loosing the ability to bear children and even death. Yet one day I awoke to a great epiphany; no longer plagued with what was lost. I finally realized as I grew older, I grew better and gained far more insight and wisdom than anything lost. Much of the petty, trivial and insignificant concerns I once had were no longer a thought in my mind. Having lived through good times and bad put real priorities in perspective and in general, for the first time maybe in my life, I felt content and was comfortable in my own skin. I may have added a few extra gray hairs, but also gained maturity and trusted my judgment.

I took risks, though not the kind associated with youth. I took a chance on me and after 30+ years decided to go back to school and earn my degree. In 2006 I received my associate degree, with honors and since then have been working on my bachelor degree in English-Professional Writing, also as an honors student.

I’ve come full circle since walking into Miss Kaye’s ballet class. Now when I have a passion or goal, instead of letting more years tick by, I go and grab it. After wanting, wishing and thinking about ballet for some time I decided to stop wanting, wishing and thinking; and start doing and accomplishing my dreams. Now on Monday night, instead of sitting in front of the tube, I am standing tall at the barre, hearing those haunting words, “plié, rélevé, chassé, rond de jambe, chaînés….”


Share with Others

Leave Behind Stage Fright

Share with Others

BY SARA WILLCUTT

Stage fright is a strong nervousness some people experience before performing for an audience. Symptoms may include: trembling, a pounding heart, an elevated pulse, nausea, a flushed face, shortness of breath, dry mouth, and forgetfulness.

To overcome this nervousness: focus on the now what you are doing in the moment, getting ready, stretching, rehearsing movements, doing makeup. Immerse yourself in the steps instead of your fears.

Be Positive
Only positive self-talk, such as I will jump high, smile bright, and land my turns. Don’t let you mind wander to the “what if?” thoughts. Don’t let your thoughts take over and scare you into thinking about what MIGHT go wrong.

Practice relaxing breathing-when you are really nervous your breathing becomes irregular. One quick fix is to hold you breathe for 20 seconds, when you start breathing again your body forces you back into a normal breathing pattern. Another calming breathing method is to breathe in for a few seconds, hold the breath for a few seconds and breathe out slowly. Repeat this pattern for a few minutes to calm you down.

Breathe from your Abdomen
Shallow panicked breathing comes from your chest. Lowering your breathing to come from your abdomen will automatically calm your body down.

Be Prepared Not Scared
Some dancers like to review routines and skills before going on stage. For some this is calming, for others, dancing right before going on stage can psyc them out. When you are nervous dance skills such as turns don’t work as well as normal. For some trying out these moves before taking the sage can confirm fears andmake sage fright worse.

Note for Coaches:
I try not to let me team wait in the hall before going on the floor at a competition. I find that waiting builds nervousness in the whole team and affects their performance. I don’t let my dancers practice their turns before going in the floor. It makes them nervous when they don’t execute perfectly. Most of the nervousness will disappear when the team starts dancing and the skills will be stronger. Doing team building games, team chants, funny dances and singing songs can keep dancers busy and focused on the group and the moment rather than becoming nervous.


Share with Others

Stop Chewing Gum! No Talking! Pay Attention!

Share with Others

By Kristin Kraining

These are just a few of the phrases I blurt out to my nine and ten year old students during almost every dance practice. Discipline. It sounds a lot easier and simpler than it really is. To have a successful dance class, the dance instructor must constantly focus on discipline. I have found this to be the most difficult part of teaching – not learning new steps, memorizing a dance, practicing at home or staying on tempo. Even if it is challenging to maintain discipline, it is essential. Being consistent with the dancers is the only way teaching can be effective.

My first mistake occurred at the beginning of the year, when I did not sit down with the dancers and inform them of my class rules and expectations. For example, I should have clearly told them that there is no talking after class starts unless the dancer raises a hand and the dancer must come to class dressedappropriately, or the dancer will be sent home.

Ultimately, the best thing a teacher can do to ensure that the dancers understand all class guidelines is to prepare an agreement form before the season begins that clearly specifies all the rules. The form should also include a list of consequences for tardiness, absences, not wearing appropriate attire, etc. The discipline system with its clearly stated rules and consequences must be consistently implemented. If not, the teacher will experience difficulties similar to the ones I faced at the end of the year. When those problems arise, parents will be disappointed in you as an effective teacher and will think that you are unfair and unprofessional. The most effective way to keep the discipline and teaching system working efficiently is to make a written record of all incidents and keep those records in the dancer’s file.

Unlike maintaining constant discipline, something that did come easily to me was providing treats! I made sure to mix it up and give the dancers a little reward after a competition, long practice or during a holiday week.

In a teacher’s first years of dance instruction, there will always be mistakes. By acknowledging and learning from each mistake, a teacher will constantly improve and become the most professional and successful instructor possible. As a result, the class will respect the instructor, develop high expectations for themselves, and work their hardest to make their way to the top!


Share with Others

Children’s Dance Theme Party Ideas

Share with Others

Ballet Birthday Party
This party plan can be tailored to fit any age.

Prep: Pick up balloons filled with helium, and tie with long ribbon. Let the balloons fly up to the ceiling of the party room, and let the ribbons hang down.

Purchase your choice of ballerina theme party decorations such as a ballet slipper piñata.

Get small pink gift bags for party favors. Fill the bags with lip-gloss, plastic rings, and pink candy.

Create tutus for the guests. You can find tulle or other martial to make a simple tutu at any fabric store. Cut a strip of fabric, and glue or sew a ribbon on the top to fasten the tutu around the waist.

Invitations: ask guests to wear a leotard, tights, ballet slippers, or similar comfortable shoes.

As the guests arrive: give the children a pink tutu to go over their leotard.

Party: Have an older student or local instructor give a simple lesson. There are also many ballet tapes for children. You can get one and help guide the children.

Have the children take a picture with their instructor.

Serve a lunch tea party style. Use small pink plates, napkins, plastic teacups, and pink plastic utensils.

Menu: Pink punch, sandwiches cut into a ballet slipper shape with a cookie cutter, berry muffins with jam, and fruit salad.

Cake: Have a bakery create a ballet slipper cake with pink frosting. Serve with strawberry and vanilla ice cream.

When the guests leave, tie a balloon to their party favor bags!


Sesame Street Disco Party
4-7 years

Invitation: create a CD on your computer of some of your child’s favorite songs. Fold paper into the DC case with all the details about the party.

Parent can rent Sesame Street costumes and be the main dancers.

Cover the walls of the party room in black plastic sheeting (available at any hardware store) and you can even put up strobe lights to get the disco effect.

You can paint shapes and designs on the sheeting. Use white paint so it shows up with the strobe lights.

As the guests arrive: give the girls feather boas and the boys top hats and gallery bow ties.

Menu: Finger foods and juice served in plastic test tube glasses (available at any dollar store).

Party favors: A small gift bag filled with musical instrument erasers, pencils, and a small musical instrument (maracas, drum, or a tambourine, etc.).

Party: Put on the CD and have a dance party with both parents and children!


Disco Diva Dance Party
7-9 years

Prep: Choose bright theme colors, such as bright pink and orange. Prints such as polka dots and zebra strips are also fun to mix in.

Use these colors and patterns to create balloon arrangements, and other decorations such as table coverings and plastic dishes, paper plates, napkins, party favors, etc.

Record your child’s favorite songs on a CD for use at the party and even as invitations.

Use your color scheme to create a DISCO DANCE DIVAS! sign for your living room or wherever the party will be held.

Invitations: Mail out the CDs with an invitation in bubble wrap envelopes. These envelopes can be found in fun colors as well! You can use the CD jewel case to insert the invitation details.

You can ask the families invited to have their child arrive in their favorite dance clothes,or you can use a dance outfit as a party favor. You can find inexpensive outfits or accessories at the dollar store or a discount store.

Another option is to make t-shirts. Hint: Post-Halloween sales are a great time to stock up on costumes and party accessories! Find discounted party supplies: Oriental Trading.

You can use a separate room in the house as a dressing room. After changing into their costumes, it is time for hair and makeup. If you have boys at the party, they can choose to have their hair done or play a game while the girls get done up. Use brightly colored make up and glitter powder.

Project time: create something for the costume such as a beaded necklace, bracelet, or vest.

Party: divide the children up in groups and send them to different rooms to put together their own dance routine! Have a parent in each room to help out. Send a CD player with each group (guests can bring more are needed) and choose a song from the party CD for each group. Give them 30 minutes to come up with a routine.

Then, have everyone come back to the main party room and show off their routines. Videotape and then do group pictures.

After the performance, the children can watch the dances on TV while they have a pizza dinner. You can set out a large mat or tablecloths on the floor for dinner.

Party favors: Use brightly colored gift bags and fill them with dance and party related gifts such as; candy, body glitter, plastic rings, body jewels, lip gloss, etc.

Tapes of the performance can be sent out as thank you notes. The memories, video, and CDs can be enjoyed long after the party!


Cheerleading Birthday Party
8-11 years

Prep: Take felt material and cut it in to a pennant shape. Glue on ribbon and foam sick-ons, which are available in cheerleading shapes.

Choose team colors. You can use your local high school team colors or choose your own. Get all your decorations in those colors.

Set up a concession stand. Use a plastic tablecloth and write concession stand in permanent marker. Serve pizza and sub sandwiches. Put snacks, like chips, into a megaphone. They can be found at party stores.

Invitations: Make pennant shaped invitations out of construction paper. Include time, date, and include that dressing up is optional.

Party: Hire a cheerleader from your local high school to teach a couple of cheers!

Cake: Make a cake in the shape of a megaphone! The cake can be cut into a shape after they have cooled. Then, after cake, the partygoers can perform their cheers for the adults!


Share with Others

Nutrition

Share with Others

By Kate Smith

When one thinks of a dancer and all of the things they need to do to continue to improve their craft, many things come to mind – stretching, taking technique classes and practicing frequently are a few. But one thing that is not as obvious from the outside is nutrition. Improving nutrition can help dancers gain more endurance, strength and improve their overall health and dance performance.

Hydration
The first thing to keep in mind is hydration. Dancers must always stay hydrated, and it can be difficult during an intense practice and performance schedule. However, the importance of fluid intake is not to be overlooked. According to Suzanne Martin’s Dance Magazine April 2003 article, “ Health and fitness for life,” “ a loss of as little as 2 percent of body fluid can imbalance a dancer’s brain chemistry to the point of creating mental confusion and loss of coordination and balance.” Martin suggests drinking an eight-ounce glass of water at the beginning of each day to help maintain hydration.

Diet
When it comes to diet, eating foods that maintain the dancer’s energy level are crucial. The Dance Today! June 2004 article, “Getting through the Day: A Dancer’s Guide to Eating on the Move,” recommends eating carbohydrates such as grains and pasta in addition to breakfast each day.

“I always recommend a sensible diet, including lots of carbohydrates and avoiding too much fat. Dancers don’t need different fuel from other people — they just need more of it because they use more energy,” former Royal Ballet dancer Deborah Bull states in the article.

Bally Total Fitness personal trainer and fitness director Matt Ledbetter also stresses the importance of carbohydrates in a dancer’s diet.

“Carbohydrate is stored as glycogen in the body, and the amount of glycogen stored in the body affects stamina and endurance,” he explains. “ Training and eating properly, with particular attention to carbohydrates, can increase and maintain glycogen stores, which is particularly important for endurance athletes, like dancers!”

Ledbetter says that protein and fat are also important for keeping up energy.

“When fats are eaten as part of healthful foods, they provide an important energy source for athletes in training. Good choices include the fats from nuts, seeds, vegetable oils and avocados.”

So taking in lots of fluids and energy-providing foods are important for a dancer’s everyday nutrition. What about performance season? Eating several small meals each day can be the trick to keeping the dancer’s energy level up during a busy performance season, according to the Dance Magazine March 2006 article, “ Eating and drinking for energy: what–and when–to eat and drink before performing.”

The article states that dance nutritionists advise dancers to eat six small meals a day during performance season, including one two hours before performing and one right after performing. Suggested foods to keep one’s body fueled include protein shakes, sandwiches, bananas, and bagels.

Peak Performance Pasta
For a tasty energizing meal, try Dance Magazine’s “Peak Performance Pasta”

1/2 pound whole-wheat pasta
Olive oil
1 small onion, chopped
1/8 teaspoon hot red pepper flakes to taste
2-3 cups bite-size pre-washed spinach and/or any combination of fresh or frozen vegetables
1 15-oz. can white, black, or red beans drained, or 1 7-.oz. can white tuna in water, drained
Fresh or dried herbs to taste
Salt and pepper to taste
Lemon juice or Parmesan cheese (optional)

Prepare pasta according to package directions. While pasta is boiling, pour enough oil into large skillet to make a thin film on bottom. Heat over medium-high heat. Add onions and stir until just soft. Add hot pepper flakes and toss. Add spinach and cook until slightly wilted (cook other vegetables until barely soft). Stir in beans or tuna and herbs. Toss until heated. Mix into drained pasta. Season, squeeze in a touch of lemon juice, and add cheese if desired. Makes 2-3 servings.

For an Asian variation, use a mixture of peanut and sesame oil. Instead of herbs, add a pinch of ginger. Sprinkle with sesame seeds instead of Parmesan cheese.


Share with Others

Improve Flexibility

Share with Others

BY SARA WILLCUTT

Flexibility is an aspect of dance that will help you improve in many areas. It is something you can work on at home between dance classes. Push yourself to gain a greater range of flexibility. Listen to your body and identify your limitations. Stay consistent and disciplined to overcome them.

Warm Up
Always warm up your muscles before you stretch.

Get Started
While stretching, gradually increase how far your muscles are stretched. Hold each stretch for about 20 seconds (time varies from person to person). Holding the stretch will deactivate your muscle spindles, and you should feel a release in the muscle being stretched. Then, you can push the stretch a little further until your muscle spindles activate, and your stretch is naturally stopped. Hold this stretch for a moment and then relax.

Do Not Overstretch
If your muscles start to quiver at any point during your stretching, back off a little. Quivering means your muscles are being overworked.

Watch Your Range
If your range of motion starts to decrease, you have stretched too far. Let your muscles rest and heal.

Young Dancers
While you are still growing, your range of flexibility will probably vary. It is normal to experience a loss of flexibility during growth spurts. Bones grow faster than muscles, and it may take some time to regain your full range. Your body will even out, just keep stretching.


Basic Types of Stretching
Proprioceptive Neuromuscular Facilitation (PNF)
The method of contacting and releasing muscles to gain flexibility.

With a partner: Lay on your back, or stand up against a wall. Lift one leg, and have your partner hold it. Then, contract your muscles as your partner pushes your leg toward your chest. Hold this for a few seconds, then relax, and have your partner push your leg closer to your chest. You can repeat this several times, moving the leg a little higher each time.

Caution: This method of stretching is effective but can cause injury if not done properly. Your partner should be credentialed as a personal trainer or physical therapist.


Active Isolated Stretching (AIS)
This method of stretching is similar to PNF, but is safer because you control the range of motion.

Lay on your back, pull your leg toward your chest with your hands or an exercise band. Contract and release muscles, then push, stretch farther, and repeat.

Caution: Pay close attention to how your muscles are feeling so that you don’t over stretch. You can pull a muscle, so use caution. Never yank on your leg.


Isometric
Method of holding a stretch for a long time.


Ballistic
Method of repeating the movement of a stretch.

Example: reaching forward to touch your toes, then pull back and repeat.

Caution: Keep your movements smooth and controlled, or you will activate your muscle spindles-which is the opposite of what you want.


*Always consult a medical professional before starting a new type of exercise.


Share with Others

How to Get the Perfect Sunless Tan

Share with Others

BY SARA WILLCUTT

As a dancer for professional dance teams, I know all about the self-tan. I have spent years trying all the options. I used to go to the tanning bed but have sworn off the bed because of the damage it causes, the heightened chances for skin cancer and the aging of the skin.

Here are several methods that I use depending on what I am doing and how dark I want to be. This might be frustrating at first. Who wants orange palms and streaky legs? But learn from my experience. Use the tricks of the trade I have learned and have fun with a beautiful looking tan that is healthy!


Prep
•   Exfoliate your skin with a cotton washcloth in the bath or shower. Loofas can cause a streaky affect. You can also use an exfoliator. Any kind works, so don’t pay a lot.
•   Shave and lotion your skin. Allow time for the lotion to dry.


Get Tan Options:
Mystic Tan at a Tanning Salon
•   Cost from $20 to $30, can be less when you purchase a package
•   Go to: www.PalmBeachTan.com
•   Lasts one week
•   Results: dark tan all over
•   Drawbacks: High cost, need to be careful to wash off hands and feet or they will be dark orange!
•   Tips: Always wear the hair cover, goggles and nose plugs or cotton in your nose. Cover your hands and feet with barrier cream/lotion.
•   For perfect feet that are not too dark, wear the foot coverings and blend a little barrier cream/lotion onto the top of your feet and your ankles. After your Mystic session, rub some of the tanning solution from your legs onto the tops of your feet. This way you will have a nice glow but no scary dark toes or soles of the feet.
•   Put a little barrier cream/lotion on your elbows, ankles, knees, and tops of your feet. You my want to put a tiny bit in your belly button, anywhere your skin is thicker the tan will become much darker.


Self Tanning Lotion
•   Costs from $7 to $30 a bottle, many applications
•   Lasts 2 to 3 days
•   Results: light glow to medium tan depending on type and number of applications
•   Drawbacks: Hard to reach your whole body.
•   Tips: use one with a tinted color or bronzer so you can see where you applied it. This will help with the streaky look you can get with lotions.
•   Wash your hands several times during application to prevent dark palms, use a nail brush or old tooth brush to scrub around and under your nails. Another option is gloves; try the cheap plastic gloves sold in a big box.


Self Tanning At-Home Spray
•   Costs $9 for the spray gun, which you keep and use again. Each cartridge will cost $8 which has several applications.
•   Lasts 3 to 4 days
•   Results: Great all-over tan, costs less than the salon. Use several applications for a dark tan.
•   Drawbacks: Can be messy to clean up around where you tan.
•   Tips: To control the mess, spray yourself in your shower or put a big towel on the floor. Use the small sponge that comes with the applicator gun to wipe up any drips or dark spots. Or use your hands with gloves on.


Tips for All Types of Tans:
•   5 to 10 minutes after your application put some plain lotion on your knees,
elbows, ankles etc. to lighten the color.
•   Let your tan dry on your skin before getting dressed.
•   Don’t shower for 8 hours.
•   Tanning solution will wash out of most fabrics. Add some OxyClean to your wash just in case.
•   Blend a little solution onto the backs of your hands to match your arms. Wipe off your palms after that.
•   Cover the skin on your face with a lightweight lotion at least 10 minutes before tanning. This will prevent the tan from settling in fine lines.
•   Wipe some of the solution off of your armpits so they don’t get too dark.
•   Most sunless tanners do not contain sunscreen. So if you will be outside, put on sunscreen after your sunless tan is dry.
•   Apply moisturizer to you skin every day to keep your tan as long as possible.


Share with Others

Dos and Don’ts for Beautiful Hair

Share with Others

There are so many products out there, so how do you choose what’s right for you? How do you care for your hair to get a shiny, healthy appearance? Here are some basic dos and don’ts to help!

Hair Care Dos
1) Get a trim every 6 to 8 weeks
•   Even if you want to keep your hair long, it is essential to get rid of split ends and keep your hair healthy. This will ensure beautiful, shiny, strong locks.

2) Shampoo your hair only when needed
•   Your hair can get very dried out if you shampoo every day. You can rinse your hair if you have excess oil.

3) Use a wide-tooth comb when your hair is wet
•   When your hair is wet it is very easy to break, so comb with care starting with the ends and moving toward the scalp. Only use a brush when your hair is dry.

4) Use products for your hair type
•   If you color your hair, use shampoo and conditioner for color-treated hair. If you have very oily hair use a deep cleansing shampoo. To keep your hair color brilliant, use a color enhanced shampoo and conditioner for your specific color.

5) Stay with one chemical treatment at a time
•   To keep your hair healthy, choose one chemical treatment at a time such as color, perm, or relaxing.

6) For drastic color changes go to a professional
•   If you want to go from brunet to blond go to a salon. At home color is good for small changes. Try a washout color for the fun without the commitment.

7) Use a styling product to protect hair from heat before drying and ironing
•   Use a styling product before you blow-dry your hair. When possible, let your hair air-dry because styling with heat cases damage to hair.

Hair Care Don’ts
1) Don’t trim your own hair. A regular scissors can damage hair and cause more split ends.
2) Don’t stay with an outdated look! Change is good. Look at magazines and talk with your stylist for suggestions.
3) Don’t use lightening products that work with the sun. They dry hair out and may make it look orange.
4) Do not go to a new salon with out getting a referral from a friend. Or you can look online for salons that are related to one of your cities’ best.
5) Avoid excessive sun, chlorine and salt water, which can damage your hair.
6) Don’t use a clarifying product more than once a week.


Share with Others

How to Get a Headshot

Share with Others

BY SARA WILLCUTT

A professional headshot is essential to getting jobs as a dancer. Make sure to get one that looks natural and like YOU. Most people choose black and white, but some choose color. An 8 X 10 glossy is the standard size for prints.

Instructions
1) Consult professional dancers, models or dance agencies in your area and find out which photographers they recommend. Do your research, look around.

2) Call several different photographers, and ask them these questions: What is the price for getting headshots done? Does that price include hair and makeup? The average price of headshots is around $75 to $150. This can vary according to the area.

3) Look at portfolios: some photographers have examples of their work or full portfolios online. Otherwise set an appointment to visit the photographer and see their portfolio.

4) Talk with the photographer to see if you feel comfortable with them and like their style. Being relaxed and comfortable is important and will come across in your photos.

5) Make sure the photographer has pictures of people with similar characteristics as you: Do they work with dancers? People your age? Make sure that they have a money back guarantee if there is a problem with the shoot, such as lighting or development. They will not re-shoot if you simply don’t like the photos.

6) Check the photographer’s references.

7) Select a photographer and make an appointment. Allow around two hours if you will have hair and makeup done there. The shoot might only take a half an hour if you are getting your makeup done elsewhere. Make sure to arrive about 15 minutes early to the studio the day of your shoot.

8) Bring makeup and hair products for touchups and bring several changes of clothing. You might want to bring one top that is more professional and one that is casual. Ask the photographer for subjections. Avoid anything that is busy, such as patterns; try to choose something that is plain.

9) Never go to a shoot that is in a remote location on in an apartment alone. Be cautious and safe.

10) Have fun at the shoot! Be relaxed and confident. Don’t force your smile. You might want to try some smiling and some not smiling. Whatever you do, look engaged. You should print one non- smiling and one smiling headshot for different auditions. Think of the mood/tone of what you are auditioning for and choose which headshot accordingly.

11) The photographer will likely print proofs for you to choose from. Some photographer that use digital cameras can have this done right away. Some use a website that you view your photos on and make a selection.

12) You will want to have your resume printed on the back of your photos, or staple it on for auditions.


Share with Others